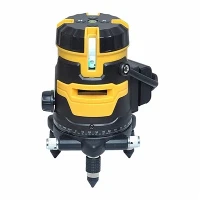

Mounting a laser level is a crucial step in various construction and DIY projects, ensuring accurate and efficient work. As a trusted laser level supplier, I understand the importance of providing clear guidance on how to mount these essential tools properly. In this blog post, I'll walk you through the process of mounting a laser level, from choosing the right location to securing it for optimal performance.
Choosing the Right Laser Level
Before you start mounting, it's essential to select the right laser level for your project. There are different types of laser levels available, each designed for specific applications. For instance, a 2 Beam Laser Level is ideal for basic leveling tasks, while a Multi Laser Level offers more advanced features for complex projects. If you're working on a retaining wall, a Laser Level for Retaining Wall is specifically designed to meet the requirements of such projects.
Selecting the Mounting Location
The first step in mounting a laser level is to choose the right location. This depends on the type of project you're working on and the area where you need the laser beam to reach. Here are some general guidelines to consider:
- Height and Visibility: Mount the laser level at a height that allows the laser beam to be clearly visible across the work area. For most projects, a height of around 4 to 6 feet is ideal.
- Stability: Ensure that the mounting surface is stable and secure. Avoid mounting the laser level on surfaces that are prone to vibration or movement, as this can affect the accuracy of the laser beam.
- Line of Sight: Make sure there are no obstructions in the path of the laser beam. This will ensure that the laser level can project a clear and uninterrupted line.
Preparing the Mounting Surface
Once you've selected the mounting location, it's time to prepare the surface. This may involve cleaning the surface to remove any dirt, dust, or debris. If you're mounting the laser level on a wall, you may need to use a drill to create holes for the mounting brackets. Make sure to use the appropriate drill bit for the type of surface you're working on.
Mounting the Laser Level
There are several methods for mounting a laser level, depending on the type of laser level and the mounting surface. Here are some common mounting methods:
- Tripod Mounting: This is the most common method for mounting a laser level. Most laser levels come with a tripod that allows you to adjust the height and angle of the laser level. Simply attach the laser level to the tripod using the mounting bracket and adjust the tripod legs to the desired height.
- Wall Mounting: If you need to mount the laser level on a wall, you can use a wall mount bracket. These brackets are typically designed to be attached to the wall using screws or nails. Make sure to follow the manufacturer's instructions when installing the wall mount bracket.
- Magnetic Mounting: Some laser levels come with a magnetic base that allows you to mount the laser level on metal surfaces. This is a convenient option for quick and easy mounting.
Adjusting the Laser Level
Once the laser level is mounted, it's important to adjust it to ensure accurate leveling. Most laser levels have adjustment screws or knobs that allow you to adjust the angle and height of the laser beam. Here's how to adjust the laser level:
- Horizontal Leveling: Use the horizontal adjustment screws or knobs to ensure that the laser beam is level. You can use a spirit level to check the accuracy of the laser beam.
- Vertical Leveling: If you need to project a vertical line, use the vertical adjustment screws or knobs to ensure that the laser beam is vertical. Again, you can use a spirit level to check the accuracy of the laser beam.
- Angle Adjustment: Some laser levels allow you to adjust the angle of the laser beam. This can be useful for projects that require a specific angle of leveling.
Testing the Laser Level
After adjusting the laser level, it's important to test it to ensure that it's working properly. Here's how to test the laser level:
- Check the Laser Beam: Turn on the laser level and check the laser beam to make sure it's clear and visible. If the laser beam is dim or distorted, there may be an issue with the laser level.
- Check the Accuracy: Use a measuring tape or a spirit level to check the accuracy of the laser beam. Make sure that the laser beam is level and vertical, and that it's projecting the correct angle.
- Check the Range: If you're using a laser level with a long range, make sure to test the range to ensure that the laser beam is visible at the desired distance.
Maintaining the Laser Level
To ensure the longevity and accuracy of your laser level, it's important to maintain it properly. Here are some tips for maintaining your laser level:
- Clean the Laser Level: Regularly clean the laser level to remove any dirt, dust, or debris. Use a soft cloth or a brush to clean the laser lens and the body of the laser level.
- Store the Laser Level Properly: When not in use, store the laser level in a protective case or a storage bag. This will help to prevent damage to the laser level.
- Calibrate the Laser Level: Periodically calibrate the laser level to ensure that it's accurate. Follow the manufacturer's instructions for calibrating the laser level.
Conclusion
Mounting a laser level is a relatively simple process, but it's important to follow the proper steps to ensure accurate and efficient work. By choosing the right laser level, selecting the right mounting location, preparing the mounting surface, and adjusting the laser level, you can ensure that your laser level is properly mounted and working correctly. If you have any questions or need further assistance, please don't hesitate to contact us. We're here to help you with all your laser level needs.


References
- Manufacturer's instructions for the laser level
- Construction and DIY guides