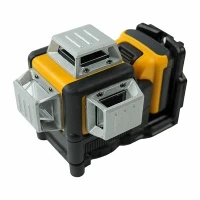

Marking tasks in construction, interior decoration, and various DIY projects often require precision and efficiency. A Laser Level Adjustable Base is an indispensable tool that can significantly enhance the accuracy of marking work. As a supplier of Laser Level Adjustable Bases, I'd like to share how to use this device for marking, along with some practical tips and considerations.
Understanding the Laser Level Adjustable Base
Before delving into the usage, it's essential to understand what a Laser Level Adjustable Base is. It is a support structure designed to hold a laser level securely and allows for precise adjustment in multiple directions. This base typically features a leveling mechanism, which can be adjusted to ensure the laser level is perfectly horizontal or vertical, depending on the marking requirements.
Step-by-Step Guide on Using a Laser Level Adjustable Base for Marking
1. Preparation
- Select the Right Laser Level: Depending on your project needs, choose an appropriate laser level. For example, if you need to mark horizontal and vertical lines simultaneously, a Mini Two-line Green Laser Level would be a great choice. Its green laser beam is more visible than red lasers, especially in bright environments. If you require more advanced features, such as digital display and self-leveling, the Digital Display Green Laser Level might be more suitable. For drainage projects, a Drainage Laser Level can provide accurate slope measurements.
- Inspect the Laser Level and Adjustable Base: Check the laser level for any damage or malfunction. Ensure that the adjustable base is in good condition and all the adjustment knobs are working properly.
- Choose the Marking Location: Select a stable and flat surface where you want to perform the marking. Make sure the area is free from obstacles that could interfere with the laser beam.
2. Mounting the Laser Level on the Adjustable Base
- Align the Laser Level: Place the laser level on the adjustable base and align it according to the base's mounting instructions. Most bases have a specific slot or mounting mechanism to ensure a secure fit.
- Tighten the Mounting Screws: Use the provided screws or clamps to secure the laser level to the base. Make sure it is firmly attached to prevent any movement during the marking process.
3. Leveling the Laser Level
- Use the Bubble Level: Most Laser Level Adjustable Bases are equipped with a bubble level. Adjust the base by turning the leveling knobs until the bubble is centered in the level indicator. This ensures that the laser level is perfectly horizontal or vertical, depending on the orientation of the bubble level.
- Check the Self-Leveling Function: Some laser levels have a self-leveling feature. If your laser level has this function, turn it on and wait for it to automatically level itself. This can save time and ensure greater accuracy.
4. Marking the Desired Lines
- Turn on the Laser Level: Switch on the laser level to emit the laser beam. Depending on the type of laser level, you may have different beam patterns, such as single line, cross lines, or multiple lines.
- Position the Laser Beam: Move the adjustable base to direct the laser beam to the desired marking location. You can adjust the height, angle, and position of the base to achieve the exact placement of the laser line.
- Mark the Lines: Once the laser beam is in the correct position, use a pencil, chalk, or other marking tools to mark the lines on the surface. Make sure to mark the lines accurately along the laser beam.
5. Adjusting the Marking as Needed
- Fine-Tune the Level: If you notice that the laser line is not perfectly straight or level, you can make minor adjustments to the adjustable base. Use the leveling knobs to fine-tune the position of the laser level until the line is accurate.
- Change the Beam Pattern: Some laser levels allow you to switch between different beam patterns. If you need to mark multiple lines or a different pattern, you can adjust the laser level accordingly.
Tips and Considerations
- Safety First: When using a laser level, always wear appropriate safety glasses to protect your eyes from the laser beam. Avoid looking directly into the laser beam, as it can cause eye damage.
- Calibration: Regularly calibrate your laser level to ensure its accuracy. Follow the manufacturer's instructions for calibration, which may involve adjusting the leveling mechanism or using a calibration tool.
- Environmental Factors: Be aware of environmental factors that can affect the visibility and accuracy of the laser beam. For example, strong sunlight or reflective surfaces can make the laser beam less visible. In such cases, you may need to use a laser detector or adjust the laser level's brightness settings.
- Maintenance: Keep your laser level and adjustable base clean and free from dust and debris. Store them in a protective case when not in use to prevent damage.
Conclusion
Using a Laser Level Adjustable Base for marking is a straightforward process that can greatly improve the accuracy and efficiency of your marking tasks. By following the steps outlined above and considering the tips and considerations, you can achieve precise and professional-looking markings in various projects.


If you are interested in purchasing a Laser Level Adjustable Base or any of our other laser level products, please feel free to contact us for more information and to discuss your specific needs. We are committed to providing high-quality products and excellent customer service.
References
- Manufacturer's instructions for Laser Level Adjustable Bases
- Industry standards and best practices for laser level usage